

How To Widen A Column In Excel
Rows and Column in Excel (Tabular array of Contents)
- Introduction to Rows and Column in Excel
- Rows and Column Navigation in excel
- How to Select Rows and Column in excel?
- Adjusting Column Width
Introduction to Rows and Column in Excel
In Microsoft excel, if we open a new workbook, we can encounter that sheet will contain tables with light grey color. Basically excel is a tabular format which contains due north number of rows and columns, where rows in excel will be in a horizontal line, and cavalcade in excel will be in a vertical line.
- In excel, nosotros can find each row past its row number, which is shown in the below screenshot, which shows vertical numbers on the left side of each sheet.
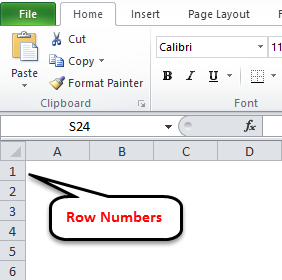
- As we tin can run into in the above screenshot that each row tin can exist identified by their row numbers like ane, 2, three etc.
- Whereas we tin can find the column in excel, which can be identified by the column header like A, B, C. which will be shown normally in all excel sheets, which are shown below.
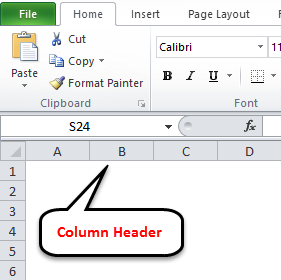
- In Excel, each column is named by its header, which shows the column header horizontally at the top of the excel sheet.
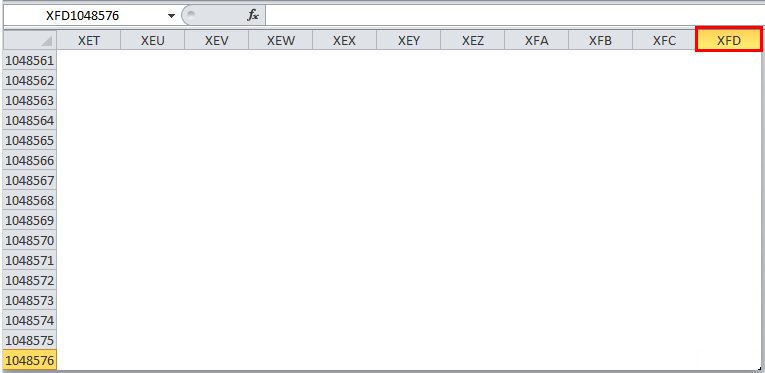
In Microsoft Excel 2010 and the latest version, we take row numbers ranging from one to 1048576 in 1048576, whereas the cavalcade ranges from A to XFD in a full of 16384 columns which is shown in the below screenshot.
Rows in excel range from one to 1048576, which is highlighted in red mark
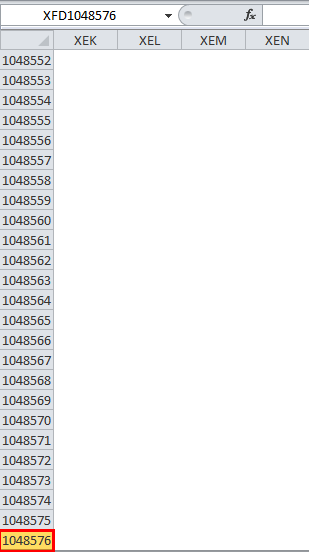
The column in excel ranges from A to XFD, which is highlighted in ruby-red mark.
Rows and Column Navigation in excel
In this example, we will run into how to navigate rows and columns with the below examples.
We can find the last row of excel past using the keyboard shortcut key CTRL+DOWN NAVIGATION ARROW Central, or else we can use the vertical scrollbars to go to the terminate of the row.
We tin observe the last column of excel past using the CTRL+Right NAVIGATION Arrow KEY, or else we can use the horizontal scrollbars to go to the end of the column.
How to Select Rows and Column in excel?
In this example, we will larn how to select the rows and columns in excel.
You can download this Rows and Cavalcade Excel Template here – Rows and Column Excel Template
Rows and Column in Excel – Case#i
Unremarkably, when we open up a workbook, nosotros can come across that canvas contains tabular rows and columns where each row is specified past their row number and column specified by their column header.
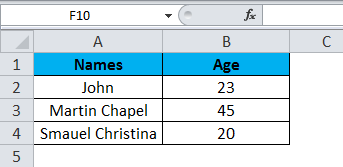
Consider the below example, which has some data in an excel sail. Here we will run into how to select the rows and columns.
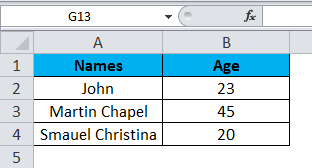
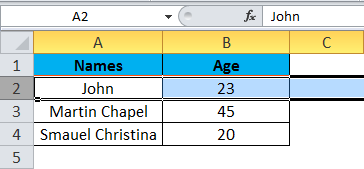
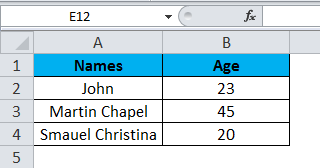
In the above screenshot, we tin can see that names and age column have their own header name A and B, and each row has its own row number.
In excel, each time when nosotros select a row or column, "Name Box" will display the specific row number and column proper name, which is shown in the beneath screenshot.
In this example, we will select the Names and Historic period, and let's run into how the rows and column header is getting displayed.
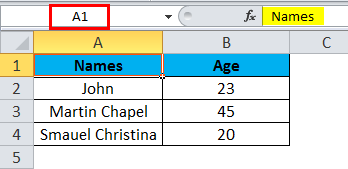
Stride 1 – First, select the cell Proper name John.
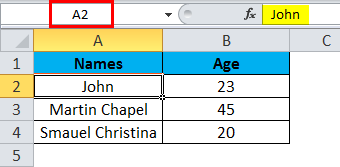
Step two – Once you select the cell name, John, we will become the row number and column name as A2 in the name box, which means that nosotros accept selected A cavalcade 2d row as A2, shown below screenshot with yellow highlighted.
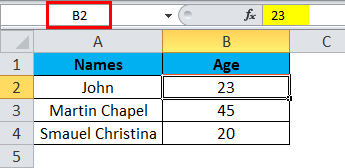
Pace 3 – At present select cell 23, where it volition prove the selected prison cell is B2 which is shown in the below screenshot with yellow highlighted.
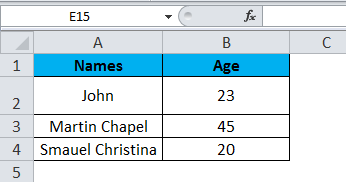
Footstep 4 – Now select all the names and columns to prove that we have four rows and two columns shown in the below screenshot.
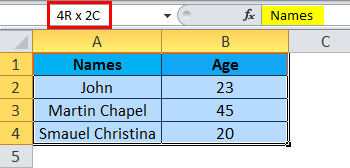
In this way, we can identify the row number and column proper noun by selecting each jail cell in excel.
Instance#ii – Changing Row and Column Size
This example shows how to change the row and column size by using the following examples.
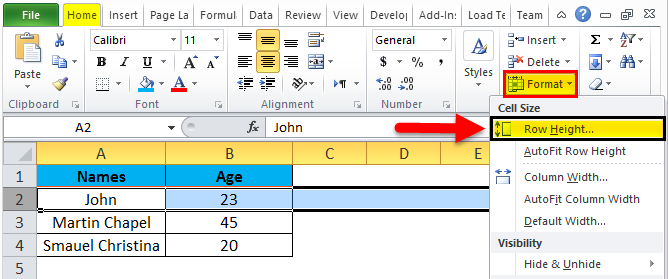
Excel row and column width size tin can be modified by using the format option in the Habitation bill of fare, which is shown beneath.
Using the format menu, nosotros can modify the row and cavalcade width where we have the list option, which are as follows:
- ROW Superlative– This is used to adjust the row height.
- AUTOFIT ROW Meridian– This will automatically conform the row height.
- Column WIDTH – This is used to adjust cavalcade width.
- AUTOFIT Cavalcade WIDTH– This will automatically accommodate the column width.
Allow's consider the below example to change the row and column width. Follow the beneath steps.
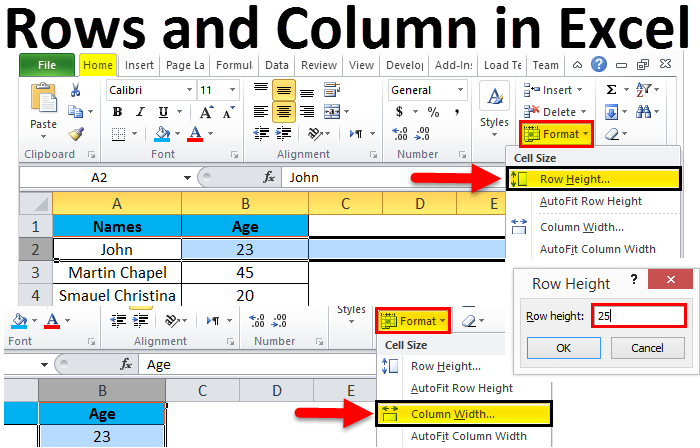
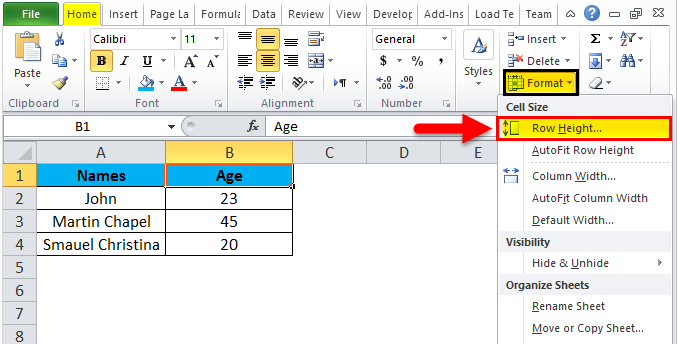
Step i – Kickoff, select the second row as shown in the beneath screenshot.
Step 2 – Go to the Format menu and click on ROW HEIGHT, as shown beneath.
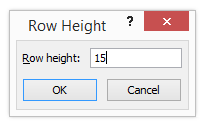
Step three – In one case nosotros select the ROW Acme, we will get the below dialog box to modify the meridian of the row.
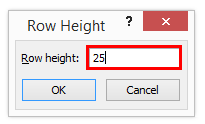
Step 4 – Now increase the row height to 25 and so that the selected row tiptop will get increased, as shown in the beneath screenshot.
We tin see that row summit has been increased when compared to the previous ane; alternatively, nosotros can modify the row top by using the mouse.
Pace v – At present go to the 2d pick in the format list chosen AUTOFIT ROW Tiptop, which will automatically reset the row to its original tiptop.
Step 6 – Select the same row and go to the Format menu.
Footstep 7 – Now select the "AutoFit Row Peak" as shown below.

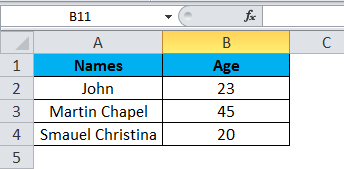
Once we click on the "AutoFit Row Meridian" option, the row top volition reset to the original position, shown beneath.
Adjusting Column Width
We tin adjust the column width in the aforementioned way by using the format option.
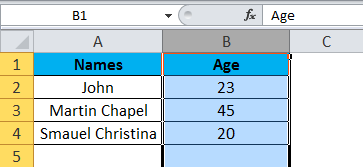
Step 1 – First, click on the cell B cell every bit shown below.
Pace 2 – Now become to the Format menu and click on cavalcade width every bit shown in the below screenshot.
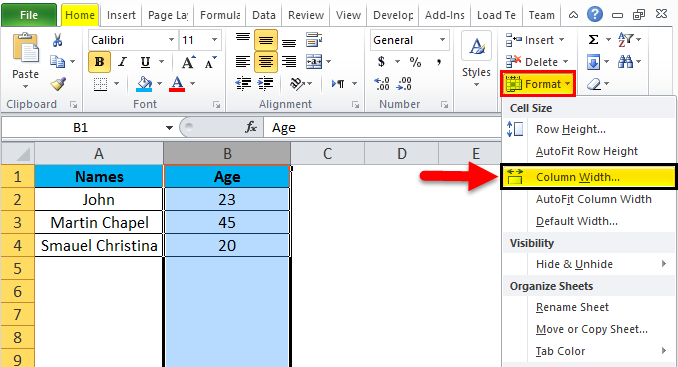
One time we click on the Column width, we will get the below dialog box to increment the column width, as shown beneath.
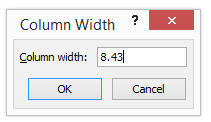
Stride three – At present increase the column width past 15 to increase the selected column width.
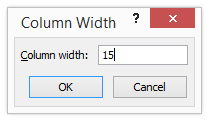
In the above screenshot, nosotros can encounter that column width has been increased; alternatively, we tin adjust the column width past using the mouse where if we place the mouse cursor, we will go the + plus mark sign well-nigh to the column.
Step four – Now click on the next choice called "AutoFit Column width". So that the selected column will get reset to its original size, which is shown below.
Things to Remember
- In excel, we tin can delete and insert multiple rows and columns.
- We can hide the specific row and columns using the hide option.
- Row and column cells tin can be protected past locking the specific cells.
Recommended Articles
This has been a guide to Rows and Columns in Excel. Here we also discuss Rows and Columns in Excel along with practical examples and downloadable excel template. You tin can also go through our other suggested articles –
- Excel Compare Ii Columns
- Unhide Columns in Excel
- Sort Columns in Excel
- Excel Columns to Rows

Source: https://www.educba.com/excel-rows-and-columns/
Posted by: brownthavelf.blogspot.com
0 Response to "How To Widen A Column In Excel"
Post a Comment